Difference between revisions of "Help:Contents"
(→How to link to other pages on this wiki) |
|||
| Line 21: | Line 21: | ||
To link word page, '''<nowiki>[[Generation 1]]</nowiki>'''. | To link word page, '''<nowiki>[[Generation 1]]</nowiki>'''. | ||
To link to a page but with something different than the name of the page appearing as the link '''<nowiki>[[G1_Ponies|G1]]</nowiki>'''. This will link to the page called G1_Ponies, but the link will show up as G1, like so. [[G1_Ponies|G1]] | To link to a page but with something different than the name of the page appearing as the link '''<nowiki>[[G1_Ponies|G1]]</nowiki>'''. This will link to the page called G1_Ponies, but the link will show up as G1, like so. [[G1_Ponies|G1]] | ||
| + | |||
| + | If you find a page is a misspelling of another page or for some reason should be replace by another page you can put a redirect on that page and the wiki will automatically take the viewer to the correct page | ||
| + | |||
| + | <nowiki>#REDIRECT [[Lickety Split]]</nowiki> | ||
== How to link to a certain point on a page == | == How to link to a certain point on a page == | ||
Revision as of 17:32, 7 December 2010
Contents
General Formatting
To make a topic do this: ==topic==, it looks like the above where it says general formatting.
To make a subtopic do this: ====subtopic====
eg:
subtopic
To make a bullet: *bulleted (the asterisk must be the first character in a row of text to be able to be a bullet)
- bulleted
To make something bold: '''bold''' (that is three apostrophes), bold
To make something italic: ''italic'' (that is two apostrophes), italic
To make a new article write a phrase you want to be the article's name and surround that phrase with double square brackets, the phrase will appear red when you finish editing the section. You can then click on it and it will lead you to a page with no contents that you may then begin editing. Another way to start a new article is to go to your browsers address bar and replace the end of the address, the part that comes after the equal sign, with what ever you want your new article to be named. (Use underscores for spaces.) This will also take you to a page with no contents ready for you to fill in.
How to link to other pages on this wiki
To link word page, [[Generation 1]]. To link to a page but with something different than the name of the page appearing as the link [[G1_Ponies|G1]]. This will link to the page called G1_Ponies, but the link will show up as G1, like so. G1
If you find a page is a misspelling of another page or for some reason should be replace by another page you can put a redirect on that page and the wiki will automatically take the viewer to the correct page
#REDIRECT [[Lickety Split]]
How to link to a certain point on a page
You can make a link jump to any topic (anything with at least two = around it) on a page. To link where Argentinean Gusty starts on Gusty's page with a link that says Argentinean Gusty
[[Gusty#Argentinean Gusty|Argentinean Gusty]]]
Spending too much time explaining pony-speak?
Rather than explaining FF and TAF in every article, link these to the glossary! [[glossary|FF]], this will link to the glossary, like so FF. Do this with every word you are not sure of to make navigating the pony wiki a cinch! (It doesn't hurt to check the glossary to make sure your term is listed there already ;)
How to add a picture to an article
Take either one of the scripts below and copy and paste it where you want your picture to go.
Edit in your image name where it says imagename.jpg, and a description of your image where it says image description.
For a full size picture use the following:
[[Image:imagename.jpg|frame|image description]]
For a thumbnail of a picture the following:
[[Image:imagename.jpg|thumb|image description]]
After you have this fully edited in place, the image name will appear in red where the image is supposed to be, click on that and you will be allowed to upload the image and the image can then appear. You can also add to the 'summary' of the image on the upload page, you may want to add "donated by ponyfan2010" for instance. You can also upload an image by clicking on the
- Upload file
link in the toolbox on the bottom left of the page. For now externally linked images are not allowed, for the sake simplicity and not collecting broken images everywhere.
How to add an image gallery
If you have a bunch of pictures that go together and you think a gallery of thumb nails would be good, heres how you do it,
The main tag is <gallery>, all the other tags are optional. This is html-y, so you have to end the gallery with a </gallery> tag.
The caption tag will give a caption to the whole gallery, the widths and heights tags determine the size of the images within the gallery. The perrow tag defines the maximum number of images per row. Between the starting <gallery>tag and the final </gallery> tag you add the images like so:
File:imagename.jpg|image description
You do NOT put any brackets around this, otherwise it won't show up.
Here is an example of a four image gallery.
<gallery caption="G1 puzzle gallery" widths="200px" heights="200px" perrow="3">
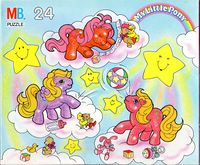
File:sparkle-babies-puzzle.jpg|Puzzle featuring the [[G1_Ponies|G1]] Baby Sparkle Ponies
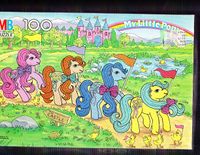
File:sister-mlps-puzzle.jpg|Puzzle featuring the [[G1_Ponies|G1]] Sweet Sister Ponies
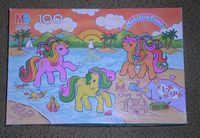
File:tropical_100.jpg|Puzzle featuring the [[G1_Ponies|G1]] Tropical ponies
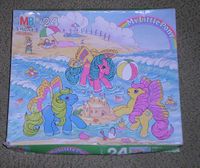
File:flitter_24.jpg|Puzzle featuring the [[G1_Ponies|G1]] Flitter ponies
</gallery>
And here is how it turns out.
- G1 puzzle gallery
Puzzle featuring the G1 Baby Sparkle Ponies
Puzzle featuring the G1 Sweet Sister Ponies
Puzzle featuring the G1 Tropical ponies
Puzzle featuring the G1 Flitter ponies
IMPORTANT NOTE ON IMAGE QUALITY!
The point of this site is big beautiful pictures. We are not limited by megabites anymore people! While any picture is better than no picture (and please upload any appropriate picture to fill up the site), we are looking for focused non-blurry pictures that are at least life size for ponies, bigger than that for symbols and eyes. You don't have to worry about the picture taking up the whole page because you can easily make it into a thumbnail. If you are taking new pictures expressly to add them here, if you can, please put together some kind of mono-tone background behind your item to make a nicer picture, i.e. a white sheet.


